 Why do we share it with you? We know you might want to turn a website on the PWA frontend, which is a nice idea, to be sure.
PWA Studio separates the frontend development process from a bit complex Magento 2 structure. It enables building stores that will perform as native mobile apps. It results in lightweight pages, faster loading time, and an engaging user experience.
Today we give you a short cheat sheet to help you deploy PWA on hosting. Give it a try.
Why do we share it with you? We know you might want to turn a website on the PWA frontend, which is a nice idea, to be sure.
PWA Studio separates the frontend development process from a bit complex Magento 2 structure. It enables building stores that will perform as native mobile apps. It results in lightweight pages, faster loading time, and an engaging user experience.
Today we give you a short cheat sheet to help you deploy PWA on hosting. Give it a try.
Requirements before deployment
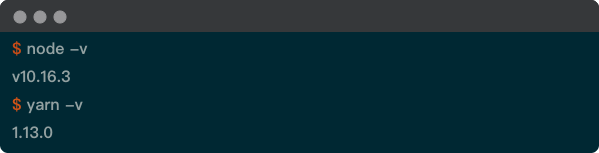
Before you proceed, make sure you follow some requirements. 1. First, you have to get the Magento 2.4.2 installed. In case you have Magento 2.3.5, learn how to connect - better to update. As an example we have the next address: backend.store.com.- Note: you can check your GraphQL endpoint https://backend.store.com/graphql with GraphiQL by Chrome extension.
How to install PWA studio
By default, it is possible to do this through running the scaffolding tool. In your terminal, navigate to the directory where you want to install your storefront project. Then run the scaffolding tool:
yarn create @magento/pwa
Then follow instructions.

#### Connecting to a Magento store #############################################
#
# Connect to an instance of Magento by specifying its public domain name.
MAGENTO_BACKEND_URL=https://backend.store.com

- cd pwa-studio-fundamentals before running the below commands.
- yarn run buildpack create-custom-origin . to generate a unique, secure custom domain for your new project. Highly recommended.
- yarn run watch to start the dev server and do real-time development.
- yarn run storybook to start Storybook dev server and view available components in your app.
- yarn run build to build the project into optimized assets in the '/dist' directory.
- yarn start after build to preview the app on a local staging server.
cd pwa-studio-fundamentals
yarn run buildpack create-custom-origin .
It will generate a unique, secure custom domain for this PWA Studio. You can see what has been done with the SSL certificate, please read the docs:
The next step will be setting the port for PWA studio.How to set up a port for our PWA application?
By default, the port has a random number. We should configure the new port. Do as follows. Open the .env file in the project root directory. Search for DEV_SERVER_PORT і STAGING_SERVER_PORT. We are gonna use 8080 for both cases.
.env
#### Development server ########################################################
#
# Specify the hostname the dev server should bind to. If this is set, it
# overrides the host chosen by custom origin settings.
# - Default when not set:
DEV_SERVER_HOST=0.0.0.0
#
# Specify the port the dev server should bind to. If this is set, it
# overrides the port chosen by custom origin settings.
# - Default when not set: 0 DEV_SERVER_PORT=8080
The same we do for the staging (production) mode.
.env
#### Staging server ###########################################################
#
# Specify the hostname the staging server should bind to. If this is set, it
# overrides the host chosen by custom origin settings.
# - Default when not set:
STAGING_SERVER_HOST=0.0.0.0
#
# Specify the port the staging server should bind to. If this is set, it
# overrides the port chosen by custom origin settings.
# - Default when not set: 0
STAGING_SERVER_PORT=8080
How to launch our PWA application?
Now you have to run a command in the development mode:
yarn watch
curl -kI https://0.0.0.0:8080
The command to see who uses the port:
lsof -i :8080
It will return Process ID. Run the next command to figure out the details.
ps -p [PID] -o args
If there are no errors in the development mode, go and test a production mode. Run the command:
yarn build
yarn start
curl -kI https://0.0.0.0:8080
Let us explain how the commands work:
- The yarn build will build the project into optimized assets in the '/dist' directory.
- The yarn start will preview the app on a local staging server.
Configure Nginx as a reverse proxy
In case you install Nginx on Ubuntu, you can learn more about that. And then we have to set up NGINX Reverse Proxy to make it distribute the load among server and PWA-studio. The Magento 2 cookbook offers the method as the default. Here you can see the PWA studio developers use it. The configuration below was generated automatically with Laravel Forge. You will have to add the setting highlighted in black. /etc/nginx/sites-available/pwademo.swissupdemo.com
 server {
   listen 443 ssl http2;
   listen [::]:443 ssl http2;

   server_name pwa.store.com; # external server name

   ssl_certificate /etc/nginx/ssl/pwademo.swissupdemo.com/1088595/server.crt;
   ssl_certificate_key /etc/nginx/ssl/pwademo.swissupdemo.com/1088595/server.key;

   ...
   ssl_prefer_server_ciphers on;
   ssl_dhparam /etc/nginx/dhparams.pem;

   add_header X-Frame-Options "SAMEORIGIN";
   add_header X-XSS-Protection "1; mode=block";
   add_header X-Content-Type-Options "nosniff";

   index index.php;

   charset utf-8;

   location / {
       proxy_pass http://0.0.0.0:8080; # internal URL to our PWA studio application
       proxy_set_header X-Real-IP $remote_addr;
    proxy_set_header X-Forwarded-For $proxy_add_x_forwarded_for;
      proxy_set_header X-Forwarded-Proto https;
    proxy_set_header X-Forwarded-Port 443;
    proxy_set_header Host $host;
    proxy_set_header Connection "";
   }

   location = /favicon.ico { access_log off; log_not_found off; }
   location = /robots.txt { access_log off; log_not_found off; }

   access_log off;
   error_log /var/log/nginx/pwademo.swissupdemo.com-error.log error;

   error_page 404 /index.php;

   location ~ \.php$ {
      fastcgi_split_path_info ^(.+\.php)(/.+)$;
    fastcgi_pass unix:/var/run/php/php7.4-fpm.sock;
      fastcgi_index index.php;
    include fastcgi_params;
   }

 }
Note: there is also another way to add SSL support. You can use Lets-encrypt service for generating SSL R3 certificates. Here we mention some sources that are gonna help you to look more deeply into this:
- https://serverfault.com/questions/768509/lets-encrypt-with-an-nginx-reverse-proxy
- https://tom.busby.ninja/letsencrypt-nginx-reverse-proxy-no-downtime/
openssl dhparam -out /etc/nginx/dhparams.pem 4096
Note: you can verify the SSL certificate on your web server to make sure it is correctly installed. Please do it after the Nginx server starts. If the result is “Testing Nginx configuration [ OK ]” you can restart the Nginx server using the command below. If not and it [ FAILED ], please review then your Nginx error log like eg. (/var/log/nginx/error.log or similar) and find the issue to fix. or But if you exit an SSH connection, the PWA application fails. So it would be better to get it run permanently. Here is why we recommend setting up and configuring pm2. And now we add our new PWA Studio process with the original name - “pwa-studio”. After adding, we start it to make it run permanently. See more about other possible PM2 managing processes. Here you can see some commands you can use within managing the “pwa-studio” process. Viewing logs. It can be useful for error debugging. Monitor To resolve the problem you should start the Magento 2 backend. To resolve the problem you should delete the old process with the name, and create the new one after each next yarn build running. We hope our step-by-step manual will help you to try your online business on PWA. In case you have questions, please ask them here in the comments.
ssl_dhparam /etc/nginx/dhparams.pem;
Test the Nginx configuration
Run the command:
service nginx configtest
service nginx restart
Check the status of Nginx
Now you can go to https://pwa.store.com and check how your application looks.
In case you see 502 Bad Gateway, it means PWA-Studio is not working. Then you should
Launch your PWA by yarn watch or yarn start commands depending on the development or production modes.
To simplify starting the PWA, we also suggest using the PM2 service. Let’s see how it works.
How to use PWA Studio with PM2
As you may remember, we run the following commands for PWA:
yarn start
yarn watch
sudo yarn global add pm2
cd pwa-studio-fundamentals
sudo pm2 start yarn --name pwa-studio -- start
sudo pm2 save
sudo pm2 ls
sudo pm2 start pwa-studio
sudo pm2 stop pwa-studio
sudo pm2 delete pwa-studio
sudo pm2 logs
sudo pm2 monit
Troubleshooting
Magento 2 backend is not working
Here's what a PWA launch looks like in console in case of error
yarn build & yarn start
FetchError: request to https://pwabackend.swissupdemo.com/graphql failed, reason: connect ETIMEDOUT 194.113.72.238:443
at ClientRequest.<anonymous> (/home/forge/pwa-studio-fundamentals/node_modules/@magento/pwa-buildpack/node_modules/node-fetch/lib/index.js:1444:11)
at ClientRequest.emit (events.js:315:20)
Common and annoying issue
This is about the necessity to delete the process, and create the new one every time
you run the yarn build command. After running pm2 logs you can see:
 me@pwa-demo:~/pwa-studio-fundamentals$ pm2 logs

 [TAILING] Tailing last 15 lines for [all] processes (change the value with --lines option)
 /home/me/.pm2/pm2.log last 15 lines:
 PM2  | 2021-05-17T09:59:37: PM2 log: App [pwa-studio:0] online
 PM2  | 2021-05-17T09:59:37: PM2 log: App [pwa-studio:0] exited with code [2] via signal [SIGINT]
 PM2  | 2021-05-17T09:59:37: PM2 log: App [pwa-studio:0] starting in -fork mode-
 PM2  | 2021-05-17T09:59:37: PM2 log: App [pwa-studio:0] online
  That means you or someone else might have run the yarn build command, but the new process was not created instead of the old one with the same name.
 sudo pm2 ls
 sudo pm2 delete pwa-studio
 sudo pm2 start yarn --name pwa-studio -- start
 sudo pm2 save
Image module optimisation issue
It looks like this:
Cannot add image optimization middleware due to dependencies that are not installed or are not compatible with this environment:
The module was definitely installed. Yet we stumbled upon the problem. To resolve it temporarily, we opened the .env file in the pwa-studio-fundamentals directory. Then we changed the values in the IMAGE_OPTIMIZING_ORIGIN option. We replaced the auto with the backend.
 #### Image Optimizing Origin ###################################################
 #
 # Specify the origin to use for images in the UI. Set to `backend` when
 # Fastly or another CDN is optimizing images, and the frontend will load
 # images directly from the Magento instance at MAGENTO_BACKEND_URL. To force
 # usage of the onboard image optimizer, set to `onboard`. Set to `auto` to
 # autodetect whether the backend is using FastlyIO and optimize onboard only
 # if it needs to.
 # - Default when not set: auto
 IMAGE_OPTIMIZING_ORIGIN=backend
Invalid host header
It happens when you start the PWA application in the development mode together with Nginx Reverse proxy.
It looks like:
“Invalid Host header“ when you run yarn watch.
To resolve the problem, we added the line below to the pwa-studio-fundamentals/webpack.config.js.
config.devServer.disableHostCheck = true;
Just 1 update is , the command
sudo pm2 start yarn --name pwa-studio -- start
still shows error 502 Bad Service (nginx error). and to resolve it, one should run
sudo pm2 start "yarn watch" --name pwa-studio -- start
Thank you again.