
Your Order has been placed. Thank You! How many times customers read this online being about to close the order success page. After ordering users forget about your website, as usual. Yet, you can keep them on. You might engage your customers to other processes at your website. That will attract them back to your store.
Today we would like to share with you a simple tutorial that will help you to understand -
How to customize the Magento checkout success page.
We recommend you to use the checkout success page more efficiently for your customers. Why not keep customers on the page and get a chance to double sales. There are many suggestions you can motivate users with:
- A discount coupon code
- Attractive block with cross-sells and related products
- Invitation to create an account
- Newsletter subscription checkbox
- Inspirational video
- Different marketing messages and other deals from your store
By the way, the Thank you page is a good solution to gain customer loyalty. To receive extra points to your website reputation and convert more clients.
To make the order confirmation page functioning correctly for future user actions, you have to know how it actually works.
We will provide you with codes and other details related to different Magento versions. You could follow the easy steps listed separately for Magento and Magento 2.
Look what you have to do before customizing a success page...
Steps for Magento 1
- The default Magento order success page is 2-column. You can change the layout in the checkout.xml.
- The file templates you can find here: app/design/frontend/package/yourcustomtheme/template/checkout/success.phtml
- In case you don’t see files, you can copy it from the base package.
- Before designing your success page you can stumble across a problem. We mean when you click the "Refresh" button on a success page, it will redirect you to the empty cart. Thus we recommend you find the file app/code/core/Mage/Checkout/ controllers/OnepageController.php and comment this line in public function successAction. Line is //$session->clear();
- Right now it would be easier to check for compatibility with different browsers.
Note: uncomment the code to prevent the wrong running of your website.
Steps for Magento 2
- The default Magento order success page is 2-column. You can change the layout in the checkout.xml.
- The file templates you can find here: app/code/Magento/Checkout/view/frontend/templates/success.phtml In order to customize that you have to copy the file from app/design/frontend/Magento/luma/Magento_Checkout/templates/success.phtml
- Before designing your success page you can stumble across a problem. We mean when you click the"Refresh" button on a success page, it will redirect you to the empty cart. Thus we recommend you find the file app/code/Magento/Checkout/Controller/Onepage/Success.php and comment on this line in public function successAction. Line is $session->clearQuote();
- Right now it would be better to check for compatibility with different browsers.
Note: uncomment the code to prevent the wrong running of your website.
Now you can set about styling a success order page. We will help you to:
- place the social-buttons block
- show address information
- add the static content block and custom CSS styles
You will also learn how to add Google Adwords conversion code. It helps you to identify how effectively your ad campaign leads to purchases, calls, etc.
How to show address information on checkout success page
Steps for Magento 1
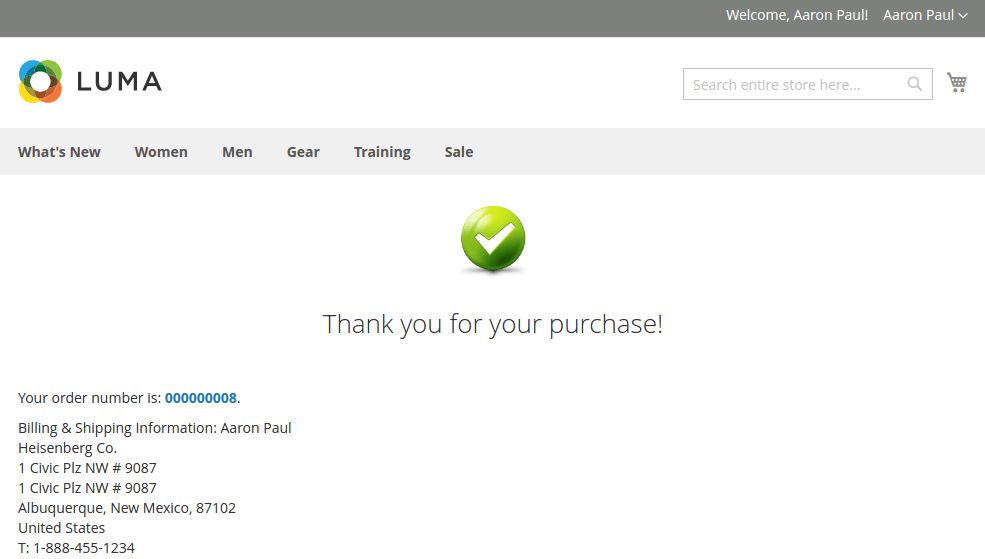
The default Magento success page looks too simple.
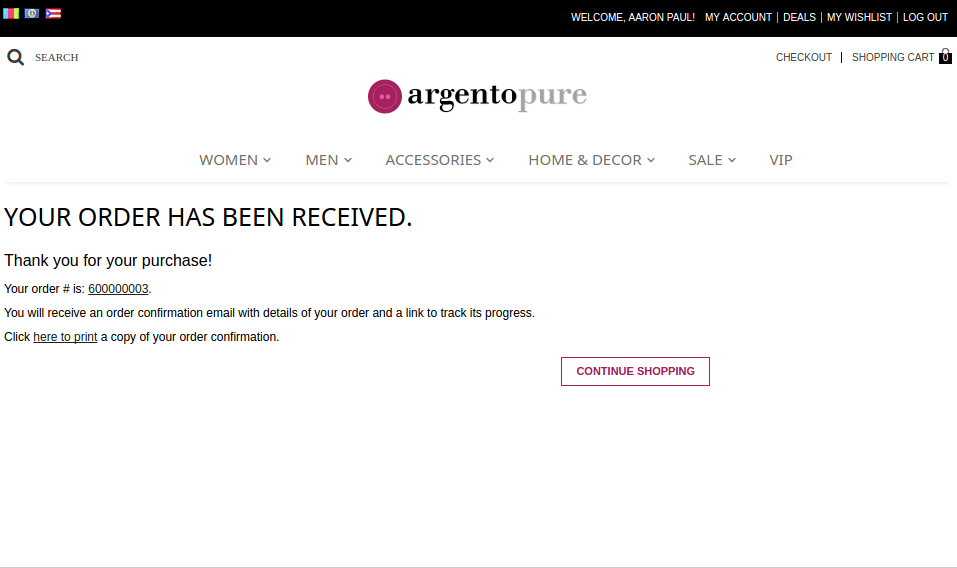
Let’s add the address block. Please add the following code to the success page template:
<p>
 <?php
         $order = Mage::getModel('sales/order')->loadByIncrementId($this->getOrderId());
         if ($order->getId()) {
             $billingInfo = $order->getBillingAddress()->getFormated('html');
             $shippingInfo = $order->getShippingAddress()->getFormated('html');
             if ($billingInfo != $shippingInfo) {
                 echo '<span>' . $this->__('Billing Information') . ':</span> ';
                 echo $billingInfo;
                 echo '</p><p>';
                 echo '<span>' . $this->__('Shipping Information') . ':</span> ';
                 echo $shippingInfo;
             } else {
                 echo '<span>' . $this->__('Billing & Shipping Information') . ':</span> ';
                 echo $billingInfo;
             }
         }
 ?>
</p>
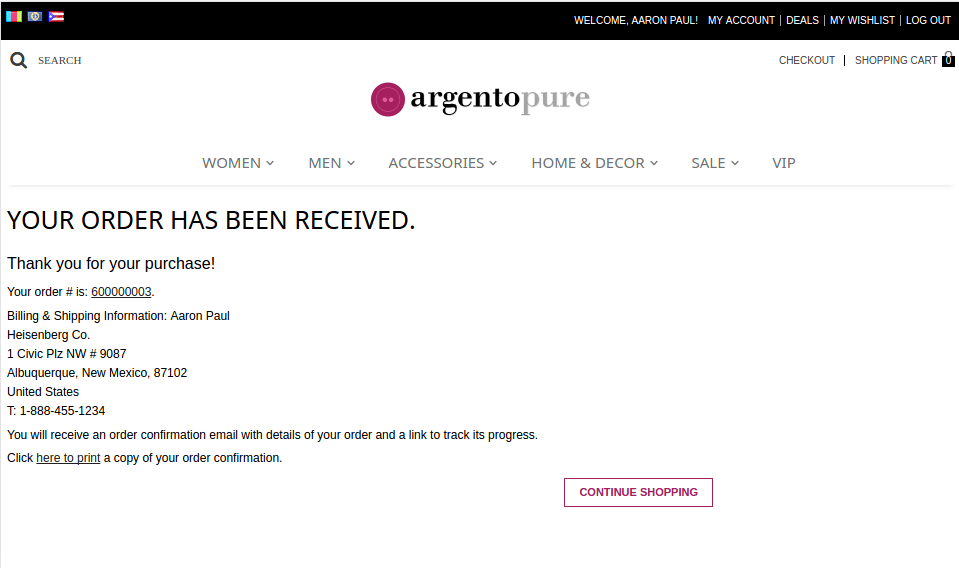
Now you can see improved Magento order confirmation page with added address block.
Steps for Magento 2
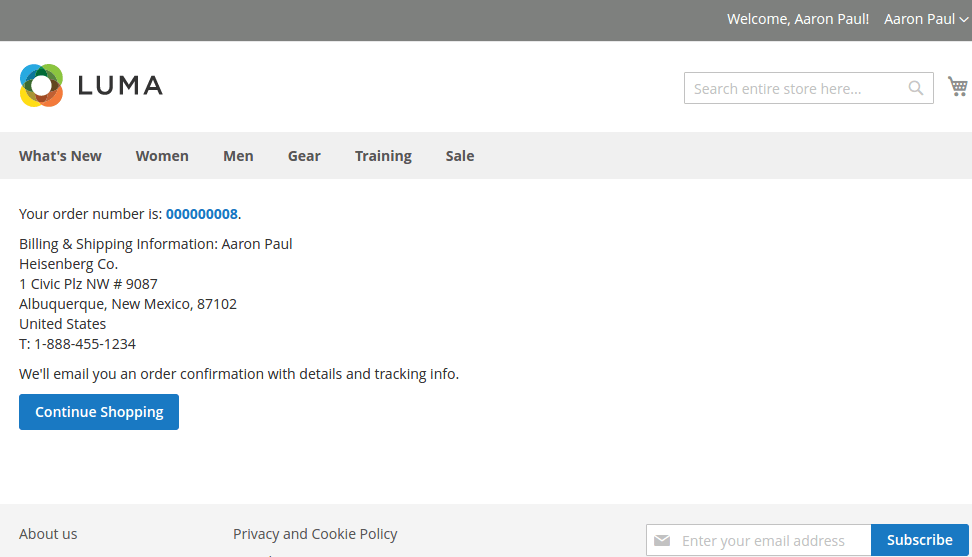
First your customers see the default Magento success page.

We suggest improving the page with user address information. Please add the following code to the success page template:
<p>
	<?php
		 $objectManager = \Magento\Framework\App\ObjectManager::getInstance();
		 $order = $objectManager->get('Magento\Sales\Model\Order')
			 ->loadByIncrementId($block->getOrderId());
		 $renderer = $objectManager->get('Magento\Sales\Model\Order\Address\Renderer');
		 $billingInfo = $renderer->format($order->getBillingAddress(), 'html');
		 $shippingInfo = $renderer->format($order->getShippingAddress(), 'html');
		 if ($billingInfo != $shippingInfo) {
			 echo '<span>' . __('Billing Information') . ':</span> ';
			 echo $billingInfo;
			 echo '</p><p>';
			 echo '<span>' . __('Shipping Information') . ':</span> ';
			 echo $shippingInfo;
		 } else {
			 echo '<span>' . __('Billing & Shipping Information') . ':</span> ';
			 echo $billingInfo;
		 }
	S?>
</p>
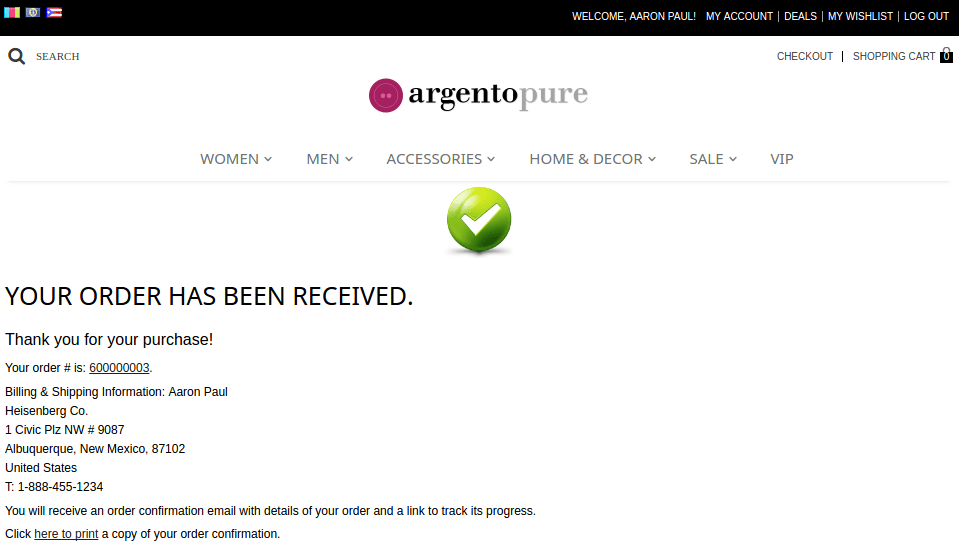
Afterwords customers will see the following content on the checkout success page.
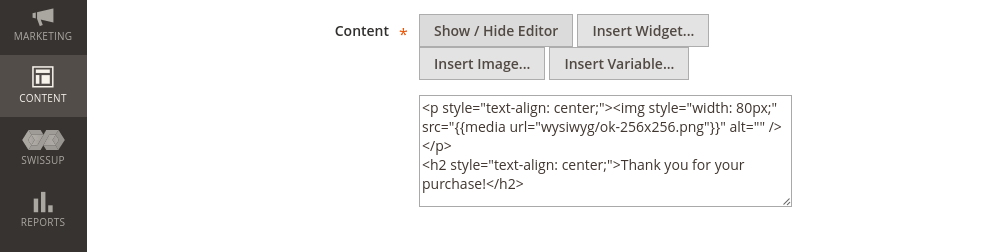
How to place a static content block
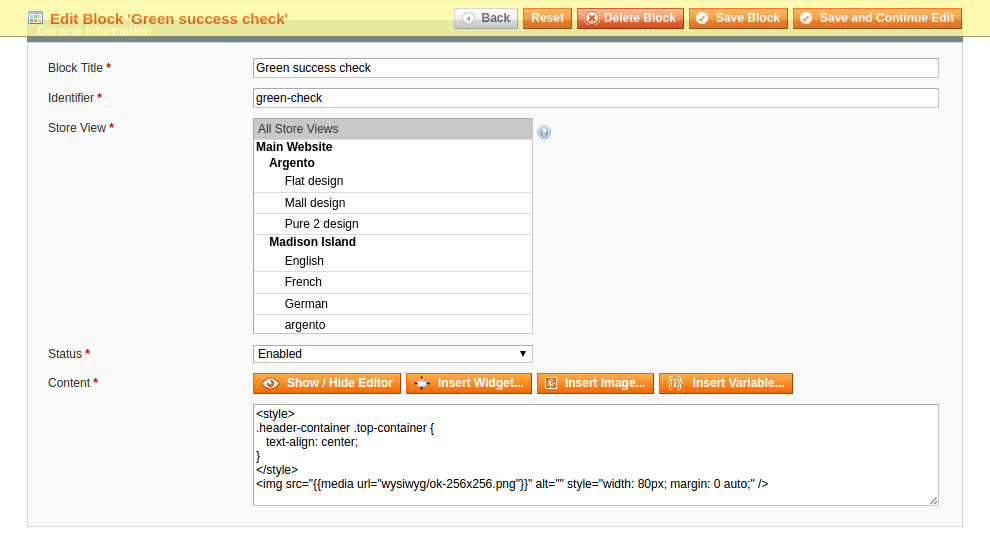
To clarify this issue, you may add a green tick to the checkout success page via CMS static block for example.
You can see already created a “green-check” CMS block.
Following the steps below, you will see a result on the frontend.
Steps for Magento 1
1. To add a static block or any other widget to the one-page checkout success page, please open the Magento CMS Widget interface.
2. You can see a button “Add New Widget Instance” at the backend page “Manage Widget Instances”. Click on it.
3. Select “CMS Static Block” as a widget type in “New Widget Interface”. Set a design theme. Then press “Continue”.
4. Fill all required fields on the next page. Then press “Add Layout Update”.
5. In the opened interface please do as follows:
- Set “Specified Page” in the “Display On” field.
- Select “One Page Checkout Success” in the field “Page”
- The “Block Reference” drop-down will help you to select a place where you want to see CMS Block.
6. Select what exactly CMS block should be shown by using the tab “Widget Options”.
Now you see a result.
Steps for Magento 2
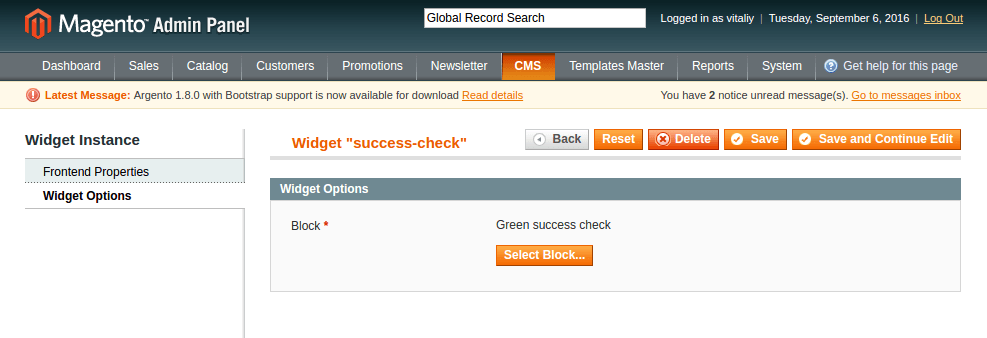
Look at already created “green-check” CMS static block.
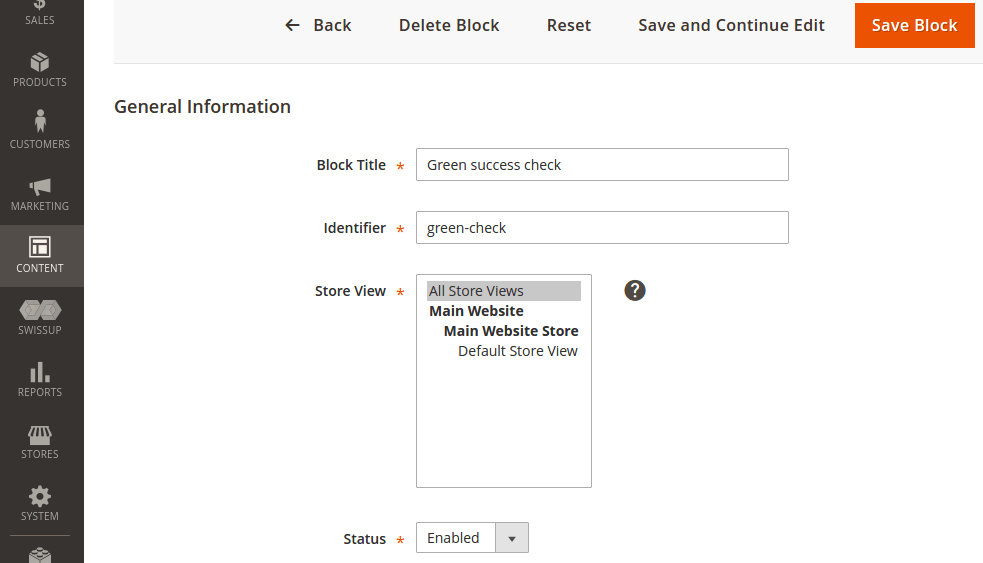
Now you have to do as follows:
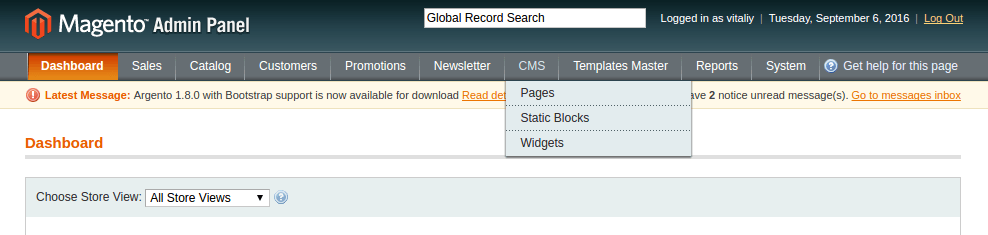
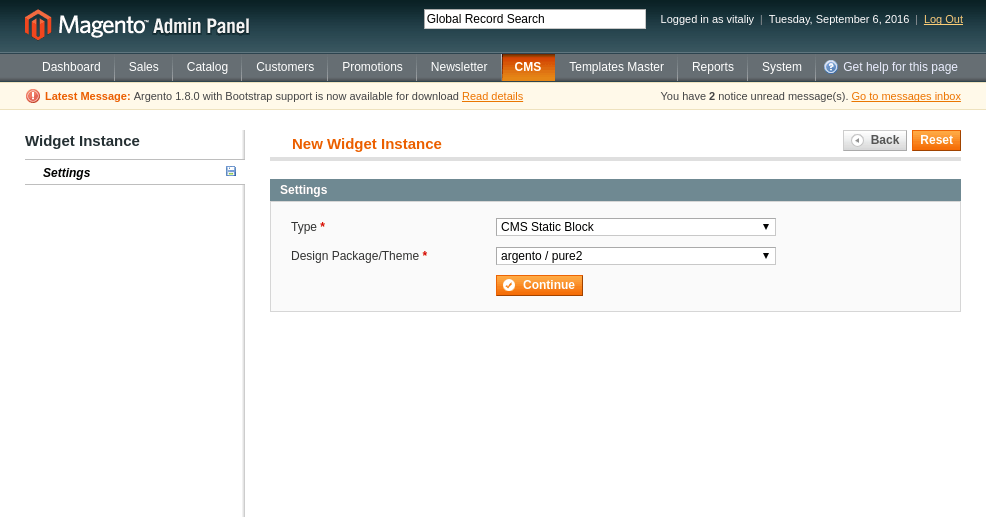
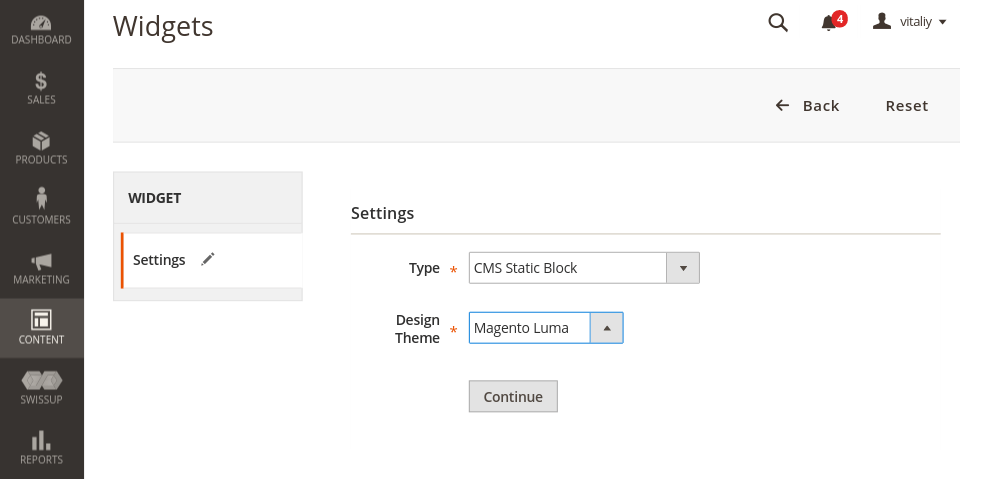
1. Please open the Magento Widget interface.
2. Choose the required value. Press “Continue”.
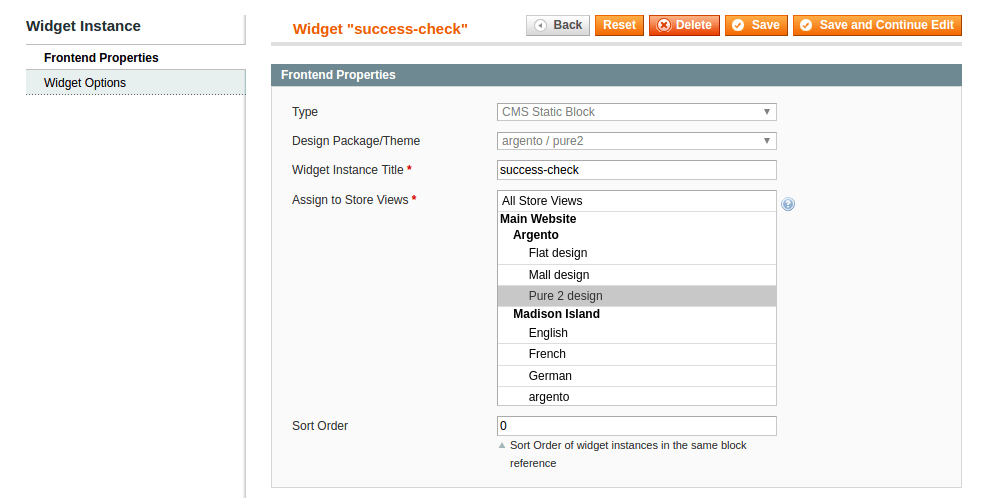
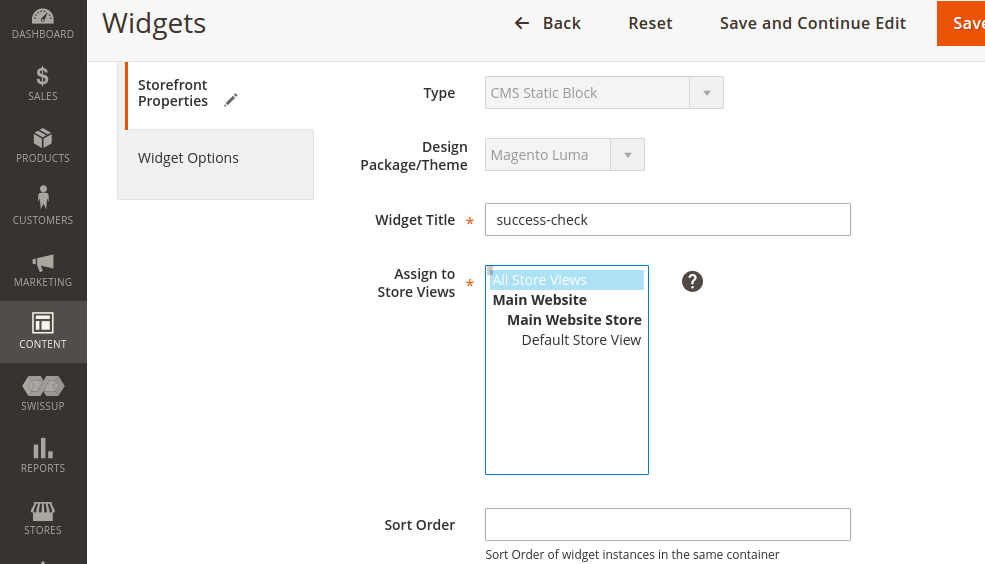
3. In a Storefront Properties fieldset, you've already had “ CMS Static Block” set as a widget type. Please specify a widget title, assign to store view, and set sort order. Then press “ Save and Continue Edit".
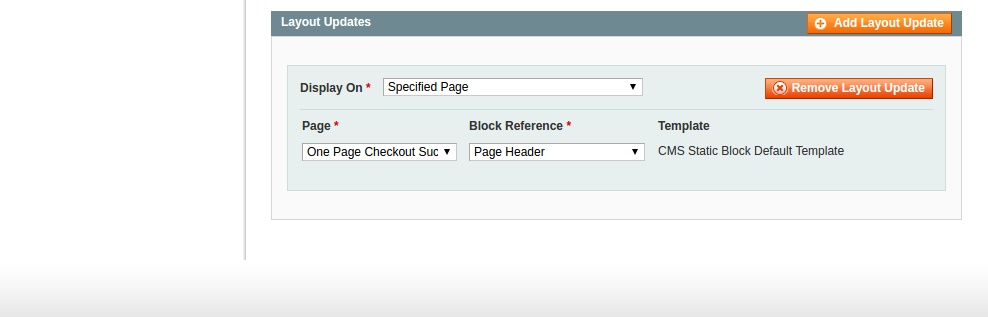
4. Click on “Add Layout Update”.
5. In the opened interface please set “Specified Page” in the “Display On” field. Select “One Page Checkout Success” in the field “Page”.
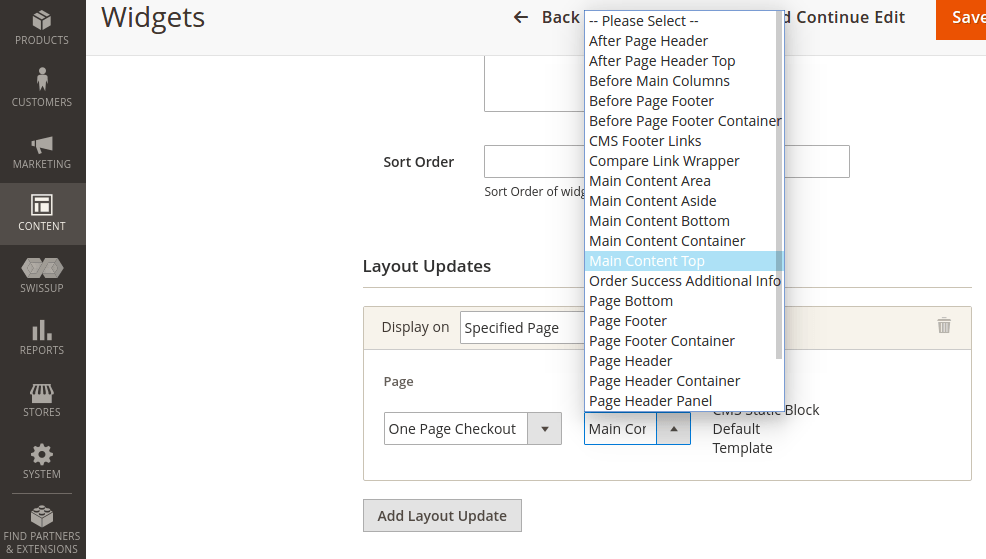
6. The “Block Reference” drop-down will help you to select a place where you want to see your CMS Block.
7. “Widget Options” fieldset will help you to select a CMS block you need to display.
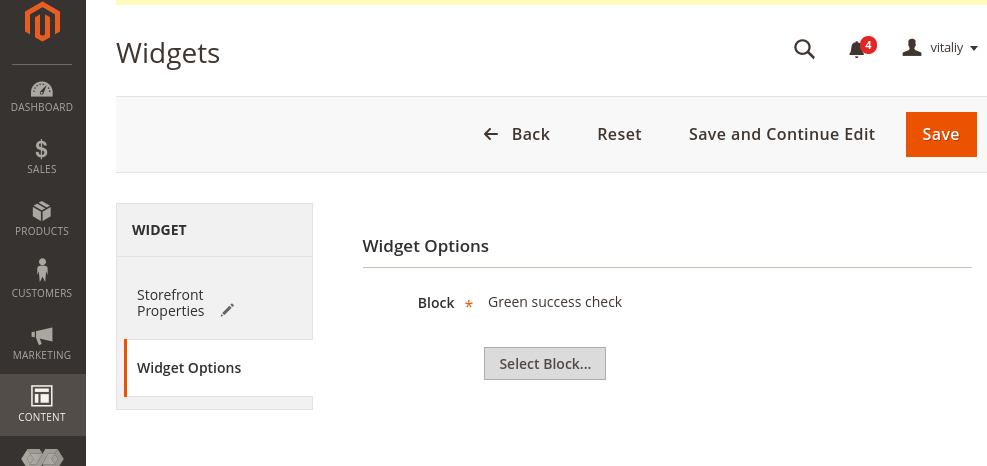
Now you can see how “Green-check” looks on checkout success page.
How to set up the Google Adwords tracking
In order to check how well your ad works, you have to add Google Adwords conversion code to the Magento checkout success page.
Steps for Magento 1
1. Open the file app\design\frontend\XXXX\XXXX\template\checkout\success.phtml
2. Use following code to add google adwords conversion tracking:
<?php
$order = Mage::getModel('sales/order')->loadByIncrementId($this->getOrderId());
$amount = (float)number_format($order()->getSubtotal(),2);
?>
<script type="text/javascript">
/* <![CDATA[ */
var google_conversion_id = 'CONVERSION_ID';
var google_conversion_language = "LANG_CODE";
var google_conversion_format = "FORMAT";
var google_conversion_color = "COLOR";
var google_conversion_label = "LABEL";
if (<?php echo $amount?>) {
var google_conversion_value = <?php echo $amount?>;
}
/* ]]> */
</script>
<script type="text/javascript" src="//www.googleadservices.com/pagead/conversion.js">
</script>
<noscript>
<div style="display:inline;">
<img height="1" width="1" style="border-style:none;" alt=""
src="//www.googleadservices.com/pagead/conversion/CONVERSION_ID/?value=<?php echo $amount?>&label=LABEL&guid=ON&script=0"/>
</div>
</noscript>
Steps for Magento 2
1.Open the file app/design/frontend/Magento/luma/Magento_Checkout/templates/success.phtml
2. Use following code to add google adwords conversion tracking:
<?php
$objectManager = \Magento\Framework\App\ObjectManager::getInstance();
$order = $objectManager->get('Magento\Sales\Model\Order')
->loadByIncrementId($block->getOrderId());
$amount = (float)number_format($order()->getSubtotal(),2);
?>
<script type="text/javascript">
/* <![CDATA[ */
var google_conversion_id = 'CONVERSION_ID';
var google_conversion_language = "LANG_CODE";
var google_conversion_format = "FORMAT";
var google_conversion_color = "COLOR";
var google_conversion_label = "LABEL";
if (<?php echo $amount?>) {
var google_conversion_value = <?php echo $amount?>;
}
/* ]]> */
</script>
<script type="text/javascript" src="//www.googleadservices.com/pagead/conversion.js">
</script>
<noscript>
<div style="display:inline;">
<img height="1" width="1" style="border-style:none;" alt=""
src="//www.googleadservices.com/pagead/conversion/CONVERSION_ID/?value=<?php echo $amount?>&label=LABEL&guid=ON&script=0"/>
</div>
</noscript>
How to add custom CSS styles to Magento order success page
Steps for Magento 1
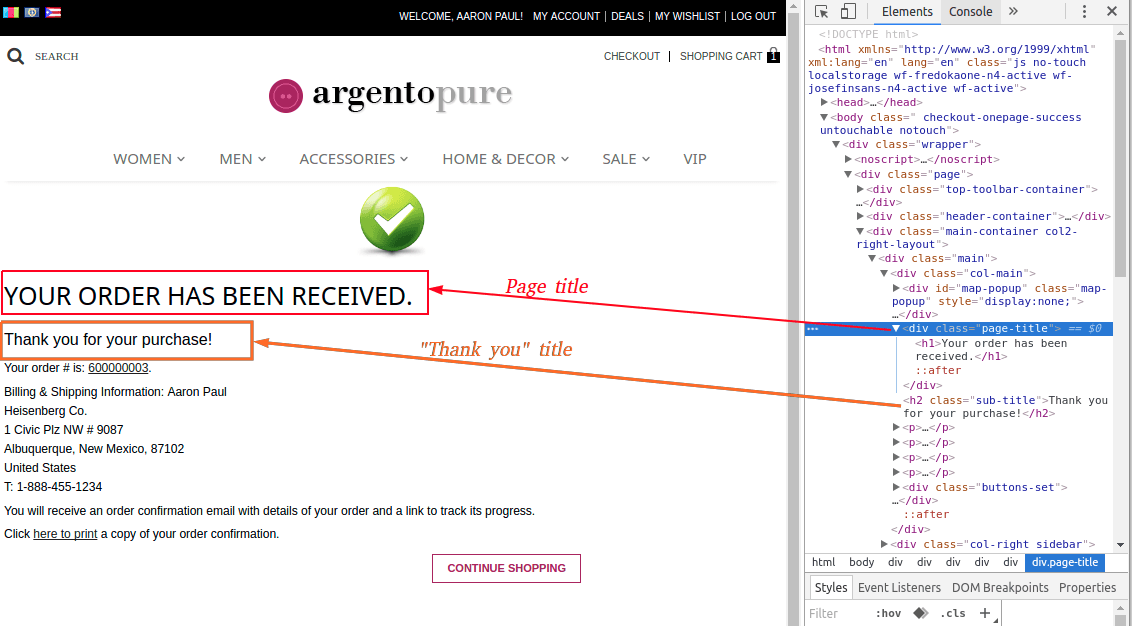
Follow the example to see the process of adding custom CSS styles in detail. Let’s start from hiding page title for success page and making “Thank you” title bigger. We’ll also convert it to uppercase.
Page title has CSS class “page-title” and thank you title is in H2 tag with class “sub-title”. Have a look at the screenshot below.
To implement those changes, please add a piece of code mentioned below to the success page template. You can insert this code at the top or at the bottom of the template.
<style>
.page-title {
        display: none;
}
h2.sub-title {
        font-size: 24px;
        text-transform: uppercase;
}
</style>
Here is the result:

PS: there is another way to add some custom styles for the success page. Without inline styles. You can expand your theme CSS-file with new styles. Magento Checkout Success Page has a unique class name “checkout-one page-success”. So we can use this class name to make sure that our custom styles affect only a success page. Add code below to CSS-file of your Magento theme. Thus you’ ll get exactly the same result as we achieved with inline styles.
.checkout-onepage-success .page-title {
        display: none;
}
.checkout-onepage-success h2.sub-title {
        font-size: 24px;
        text-transform: uppercase;
}
Steps for Magento 2
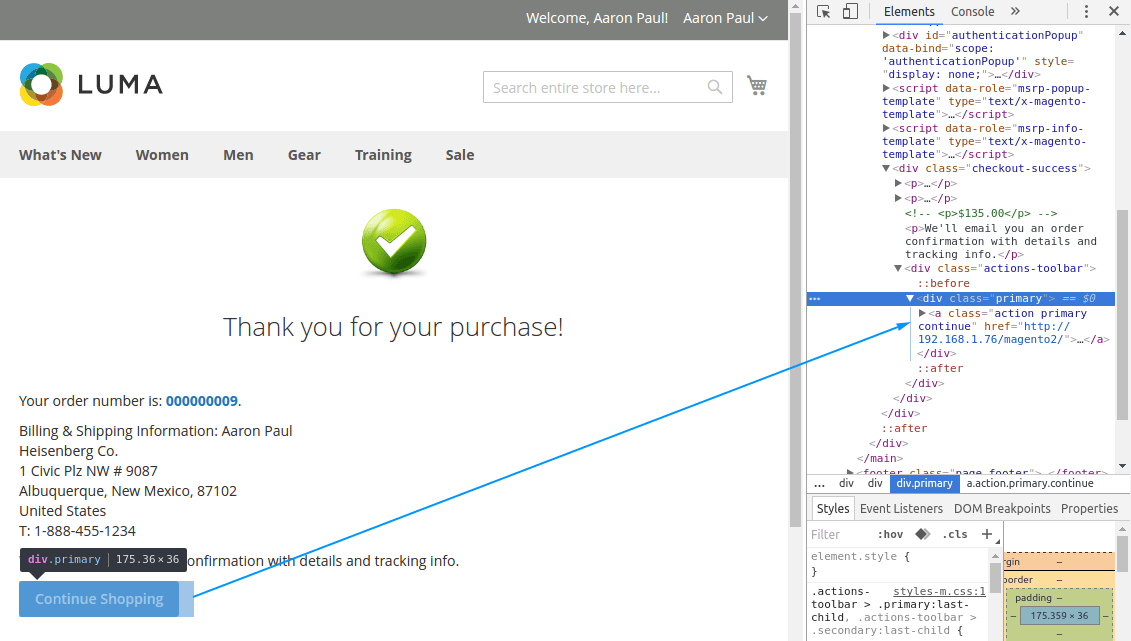
Follow the example where we’re going to change the “Continue Shopping” button color and move it to the right. This button is a hyperlink with three CSS classes - ‘action’, ‘primary’, and ‘continue’. It is placed in the DIV element with class “actions-toolbar”. Take a look at the screenshot below.
To apply changes, please add a piece of code mentioned below to the success page template. You can insert this code at the top or at the bottom of the template.
<style>
.action.primary.continue {
    background-color: #83B33F;
    border-color: #83B33F;
}
.action.primary.continue:hover {
    background-color: #668E2D;
    border-color: #668E2D;
}
.actions-toolbar .primary {
    float: right;
}
Here is the result:

PS: there is another way to add some custom styles for the success page. Without inline styles. You can expand your theme CSS-file with new styles. Magento Checkout Success Page has a unique class name “checkout-one page-success”. So we can use this class name to make sure that our custom styles affect only the success page. Add code below to CSS-file of your Magento theme. Thus you’ ll get exactly the same result as we achieved with inline styles.
.checkout-onepage-success .action.primary.continue {
        background-color: #83B33F;
        border-color: #83B33F;
}
.checkout-onepage-success .action.primary.continue:hover {
        background-color: #668E2D;
        border-color: #668E2D;
}
.checkout-onepage-success .actions-toolbar .primary {
        float: right;
}
That’s it.
Want to know what’s the last important step to verify your Magento order success page looks awesome?
If you complete your Thank you page styling, you should test all done changes. When you refresh a success page, it will redirect you to the shopping cart, as usual. Thus you have to create a new order each time you make customizations to the checkout success page.
To simplify and speed up the testing process, you can follow our recommendation:
Please comment out the following lines in a Checkout controller for a short time:
#File: app/code/core/Mage/Checkout/controllers/OnepageController.php
public function successAction()
{
$session = $this->getOnepage()->getCheckout();
// if (!$session->getLastSuccessQuoteId()) {
// $this->_redirect('checkout/cart');
// return;
// }
...
Now feel free to reload a success page. You can also see the following call near the end of this method in the last versions of Magento:
$session->clear();
This will help you to make the checkout success page to be shown one time. In case you work with the last order number and/or last order object you' ll probably comment this out. The information between page reloads will be saved.
A bit more ideas for testing the customized success page...
Fortunately, there is an extra way to test a success-page. No boring steps, no new order creation. Using a free testing tool you can preview the Magento checkout success page without coming through the whole checkout flow. Why not try out.
What about ready to use Magento checkout success page?
Customizing the order confirmation page can take a long time. If you are a too-busy person, you will likely value a ready Success Page solution. Thus you find helpful a Success Page module built-in FireCheckout extension. Through the module interface, you can enable the display of 2 static blocks without editing the template file. You can place CMS blocks either above or below the basic order information. In fact, you can place any kind of extra content there. Like cross-sells, promotional content, polls, social media links, discount coupon, etc.
We would also like to draw your attention to the Advanced Checkout Success Page extension. This module comes with 10 predefined blocks. You can move them and show anywhere on the Magento Thank-you page. The module allows you to add custom javascript to the success page, that can help you make the best of the checkout success page layout.
Summary
Hope this post will help you to design a custom checkout success page and make it easy to get feedback.
You can also review some more useful articles that will help you to experiment with Magento functionality:
- How to remove Magento 2 footer links in your theme.
- All you need to know about color swatches.
- Practical guide to Magento 2 layered navigation.
- How to edit checkout fields in Magento 2.
- The most informative guide about managing banners.
- How to remove product compare functionality.
In case you have a question or other tips to customize the order confirmation page, please post comments.
It should be
$amount = (float)number_format($order->getSubtotal(),2);
NOT
$amount = (float)number_format($order()->getSubtotal(),2);