Recently we shared with you the ultimate tutorial on how to add Magento 2 mega menu. In the meantime, it is interesting to look at examples of other navigation menus.
Today let’s see how to create a responsive navigation menu with icons. Iconic menus are clear and eye-catchy. They enhance categories recognition, that speeds up the navigating through your store.
In the tutorial, you’ll see how easily edit top navigation menu. You’ll see how to replace the main menu categories with icons in few steps. We also show you how to display icon inside dropdown. Next, proceed to a discussion of it.
See a few advantages of the Iconic navigation menu
- Well-organized icons consume less space than text.
- Icons clearly represent choices for clients who speak different languages
- Icons naturally help users navigate through a website. Iconic menu items simplify the option selection.
- Visuals make your navigation menu more engaging.
How to enable Iconic Menu for Magento 2
Today we build the Top Iconic menu and Dropdown Iconic menu for Magento 2 Luma theme. We use our Magento 2 Navigation Pro module. It includes a menu builder. That helps you to create a new menu with a few clicks.
Please go to Swissup > NavigationPro, and press “Add New Menu”. There are only a few fields to fill in. Please press Save in the end.
- Name: we call it Testiconicmenu here.
- Type: select Iconic menu in the drop down
- Import Categories From: choose default Category
- Replace Top Menu at: here you have to specify a store view where you want a new menu to be shown.
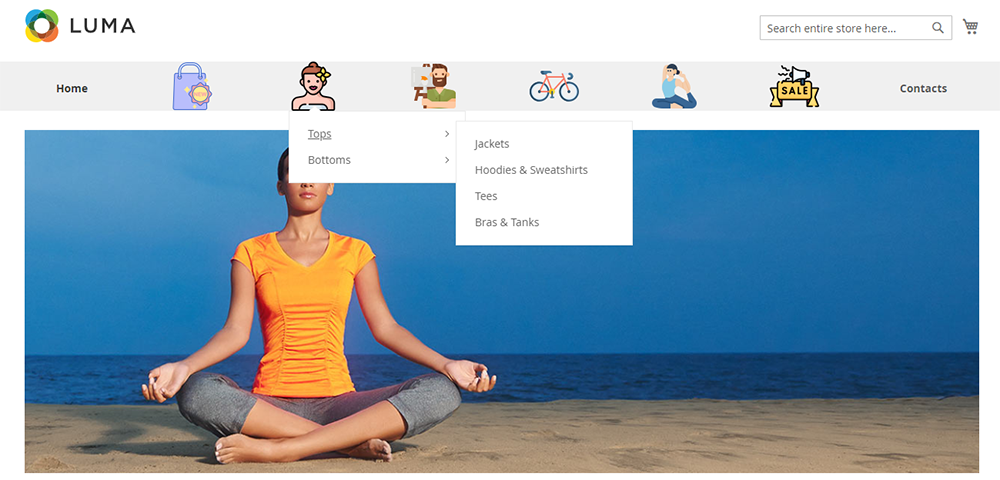
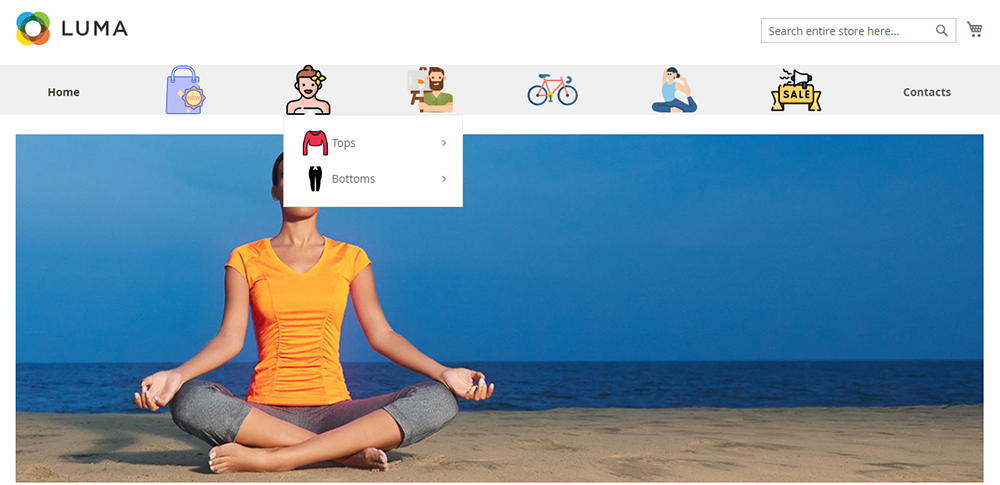
As a result, you can see the new amazing Top Iconic menu.
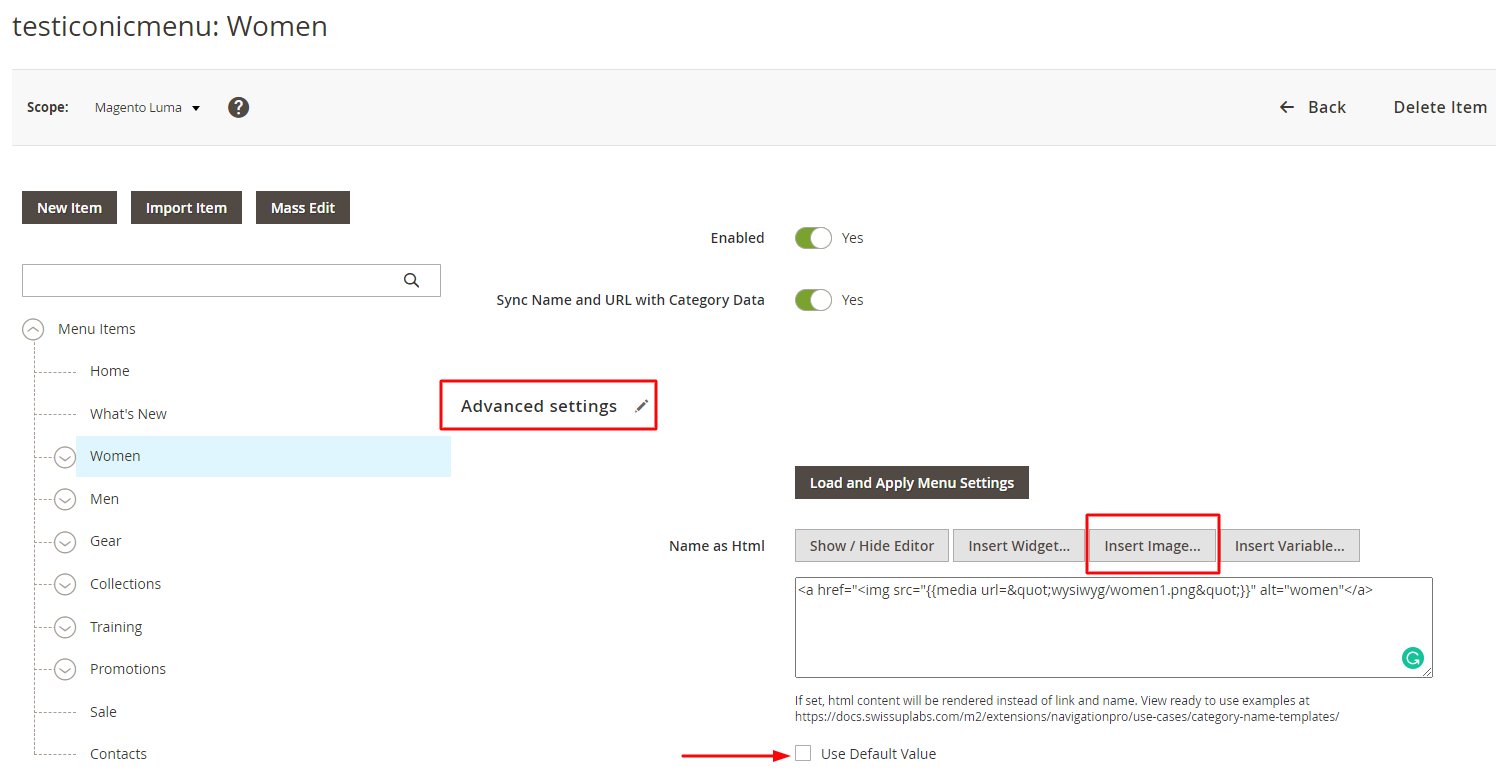
Please keep in mind that you should have downloaded all the icons you need before. Our module allows for assigning icons to the top categories as follows:
- Choose the top category you need to assign the icon to.
- Select Advanced Settings fieldset
- Uncheck the Use Default Value field
- Add the icon via the Insert Image button
- Press Save.
In the next paragraph, we are gonna guide you through the process of building Magento 2 Iconic Dropdown menu. We will add an icon inside the dropdown menu list. Continue to read.
How to show icons next to the dropdown menu elements
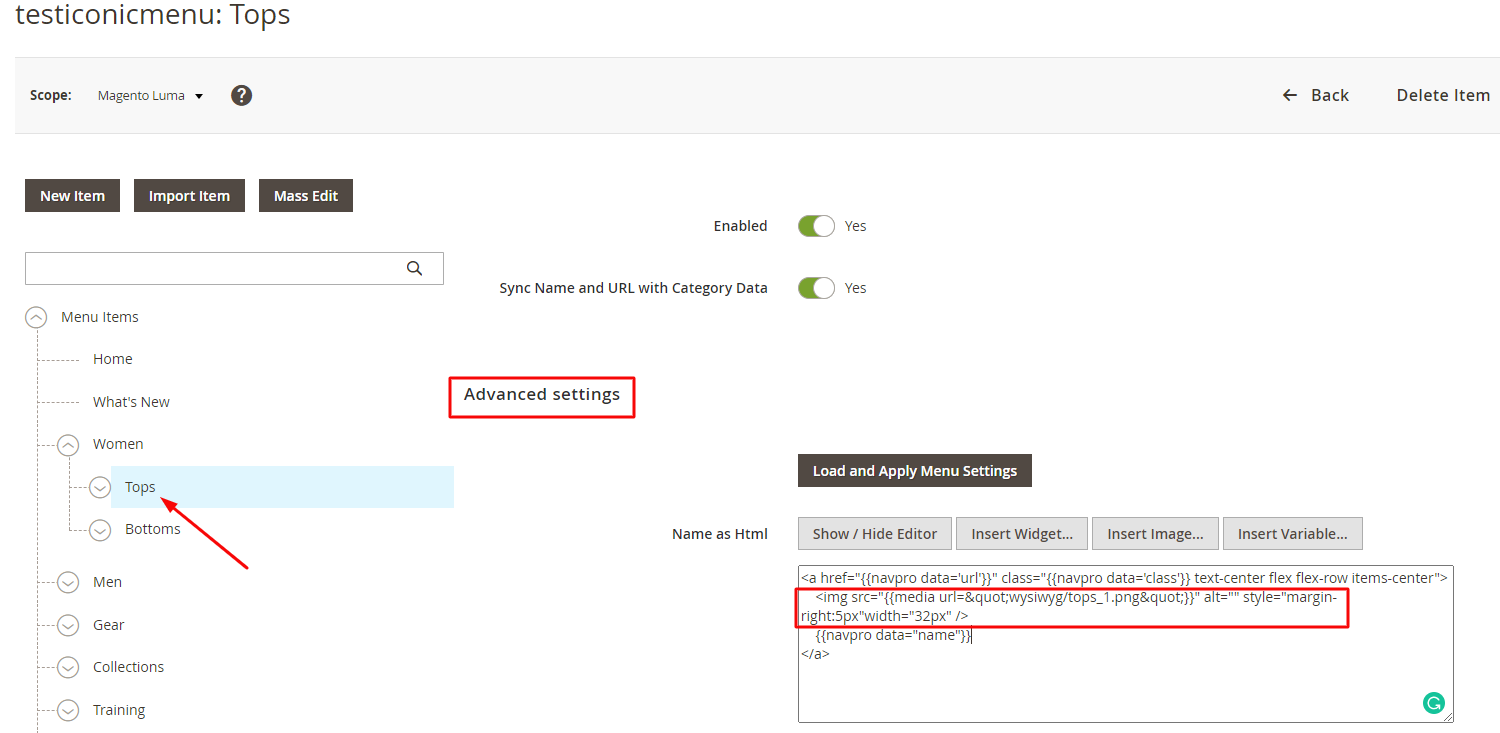
To display an icon inside a dropdown, you have to select the subcategory in the item tree.
The Navigation Pro extension comes with easy to use interface. Within the Menu Items Tree, you have quick access to each menu subitem. Every subitem of the dropdown list has advanced settings. You are able to apply the modifications to exactly chosen subitems from your Iconic menu.
Well, let’s add icons inside the Women dropdown menu list.
There are no requirements for special skills. First, you have to pick the icons. Then please follow the next steps.
- Stay in the same Iconic menu we built above. Or you can create the new Iconic menu where you will put corresponding icons with dropdown menu items.
- Choose the dropdown sub-item in Menu Items Tree
- Work in Advanced Settings fieldset.
- Paste the following code to “Name as HTML” option:
<a href="{{navpro data='url'}}" class="{{navpro data='class'}} text-center flex flex-row items-center">
    <img src="{{media url='wysiwyg/image.png'}}" alt="" />
    {{navpro data="name"}}
</a>
- You have to change the image path only. You can style the image CSS property according to you needs. That will help you to show icon above the dropdown item, or right, etc.
NOTE: pay attention to {{navpro data="name"}} variable. Our module includes its own variables list.
See results. The menu looks nice.
That’s it. The whole process took a short amount of time. We hope you will be able to add other informative icons to the Magento 2 navigation menu. You can also see the user guide for more information.
Feel free to share your comments with us.
Please also review some more useful articles that will help you to experiment with Magento functionality:
- How to remove Magento 2 footer links in your theme.
- All you need to know about color swatches.
- Practical guide to Magento 2 layered navigation.
- How to edit checkout fields in Magento 2.
- The most informative guide about managing banners.
- How to remove product compare functionality.