
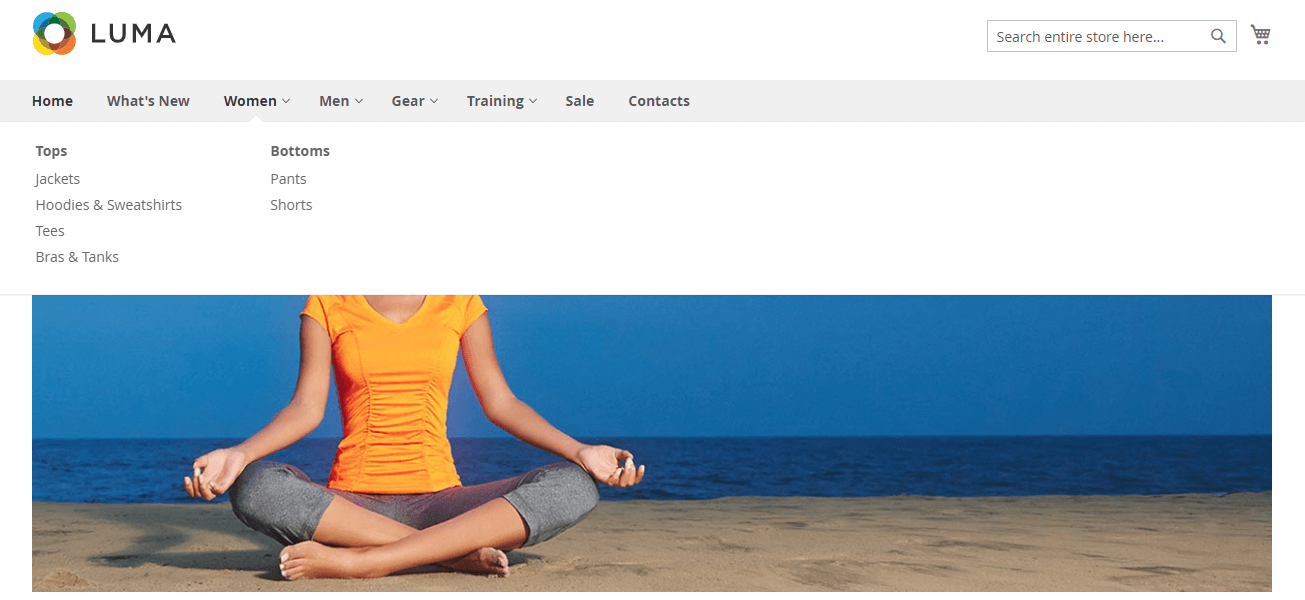
We are happy to share with you the ultimate tutorial on how to add Magento 2 mega menu. It's better to use it when you should go smaller with a number of dropdowns. You will still show a compact structure with all categories and subcategories without making users hover, scroll, and click. Besides friendly dropdowns mega menu shows images or icons that quickly present the content of the menu to visitors.
In the tutorial, you’ll see how to edit top menu items in Magento 2, how to add image to dropdowns, how to add widget quickly to the navigation menu, and how to add label to Magento 2 mega menu.
Read to learn about extending the Mega Menu possibilities and create smooth user experience.
This article is not the first from a series of articles that show how to create an advanced navigation menu. Previously we created an Amazon-like menu for Magento. We intend to involve you in the process of improving the Magento 2 menu step by step.
How to enable Mega Menu Magento 2
Today we enable a mega menu for Magento 2 Luma theme by using the Navigation Pro module. Our module works as a user-friendly menu builder. So you will be able to add a new menu with just a few clicks.
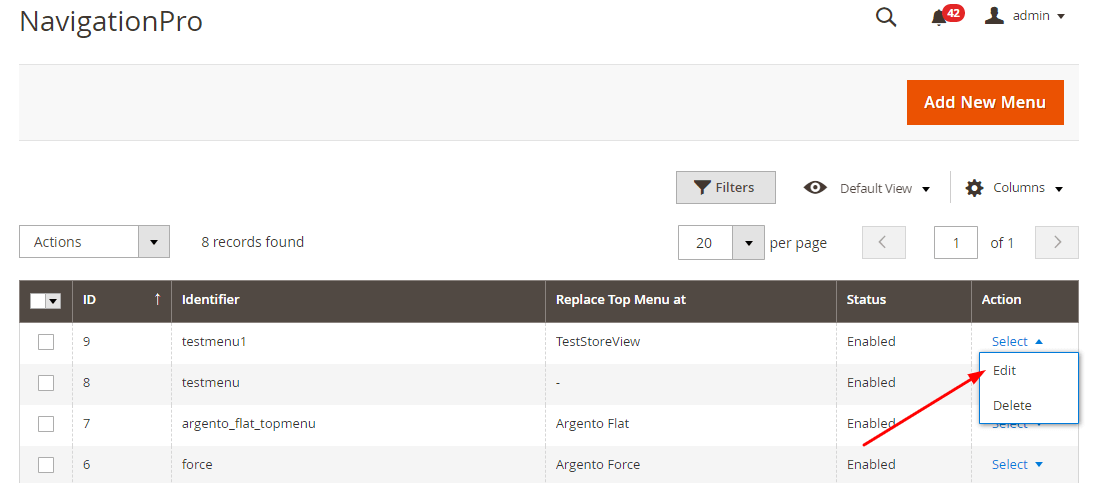
Well, you have to navigate to Swissup > NavigationPro, and press “Add New Menu”. You can see only a few fields to fill in.
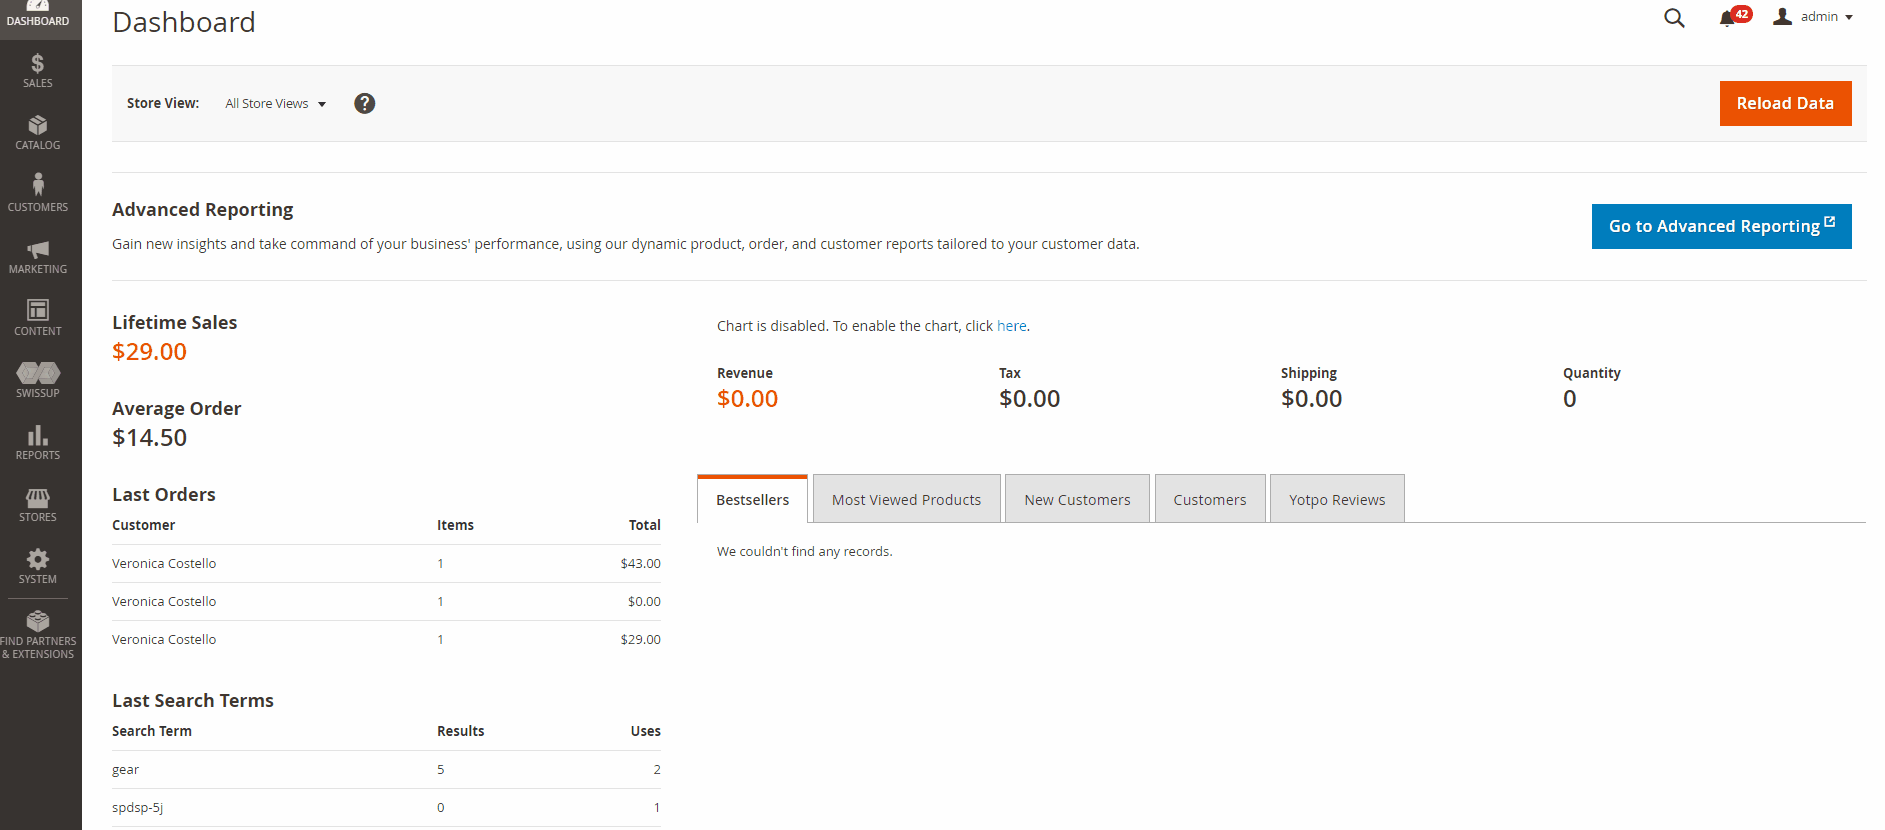
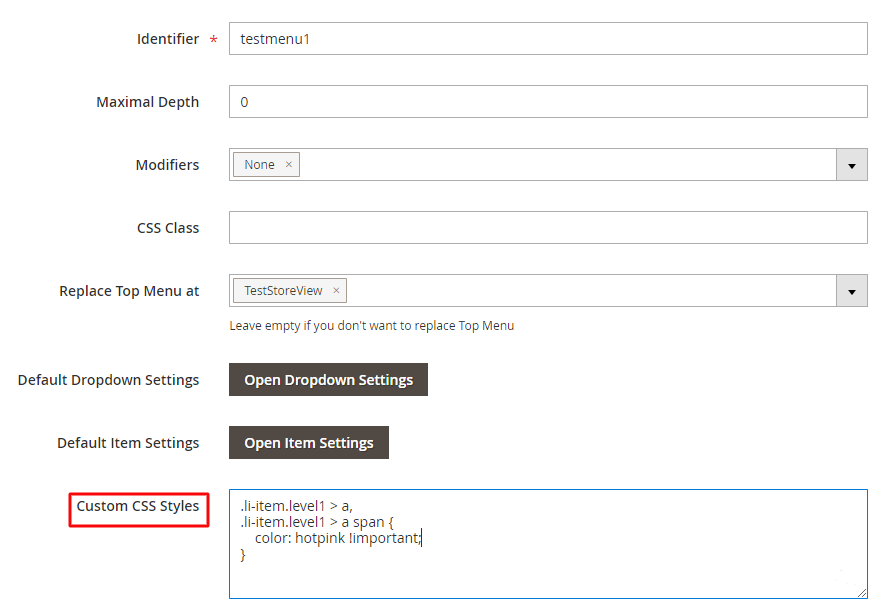
- Name: let’s call it testmenu1
- Type: select Mega Menu in the dropdown
- Import Categories From: default Category
- Replace Top Menu at: here you have to specify a store view where you want a new menu to be shown.
That’s it. It was easy and quick. Now instead of the default Magento 2 menu you got Mega Menu dropdown. Obviously it will be refined. You will see it in our step-by-step guide.
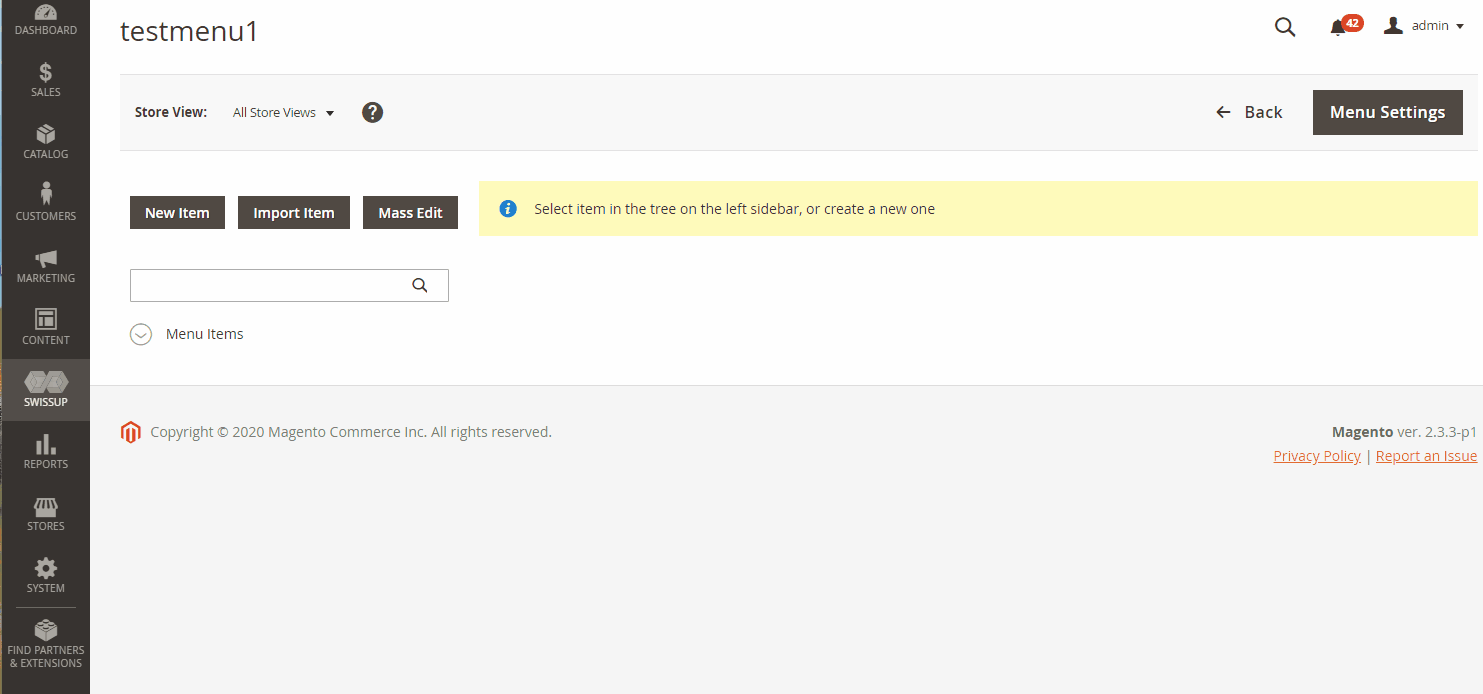
After adding new menu, choose it in the list to go on with Magento 2 mega menu customization.
The extension allows for adding various types of content right in the mega menu bar. By using our menu manager in Magento 2, you will be able to:
- Change menu styles.
- Add new items or import categories from your catalog.
- Create complex dropdown contents.
- Modify the drop-down layout, width, position.
- Set a custom submenu background image.
- Add the appealing content via widget, plain html, subcategories, and child Items.
- Change the color for the menu and submenu Background/Text.
- Add menu icon or highlight the category name with New, Sale, or other catchy labels.
All these adjustments will help you to attract customers’ attention to a wide range of categories of your store. And hence, boost users shopping experience.
With M2 Navigation Pro extension, you will configure the menu without any technical skills. Let’s get started.
Sub menu items. Creation and customization.
In the mega menu by Navigation Pro, you can see the easy-to-use. It allows you to reorganize, create, import new items into Menu.
You can add a new menu item or import categories into your new mega menu. It’s simple to drag and drop items as well as choose subcategories to start modifying them.
Each menu item has advanced settings that get applied to exactly chosen items added to the Magento 2 mega menu.
Adding widget to the menu in Magento 2
The Navigation Pro module allows adding a widget directly to the menu. So you can easily show the latest products, a slider, images, or custom HTML. In our case, we create the Hot Deals menu item which is shown alongside all main top-level categories. Then we are gonna add a widget.
Let's see how to add a new item to the top menu first.
Please do as follows:
- Go SwissUp - Navigation Pro. Select the newly created mega menu in the grid.
- Press the New Item button above the Items tree.
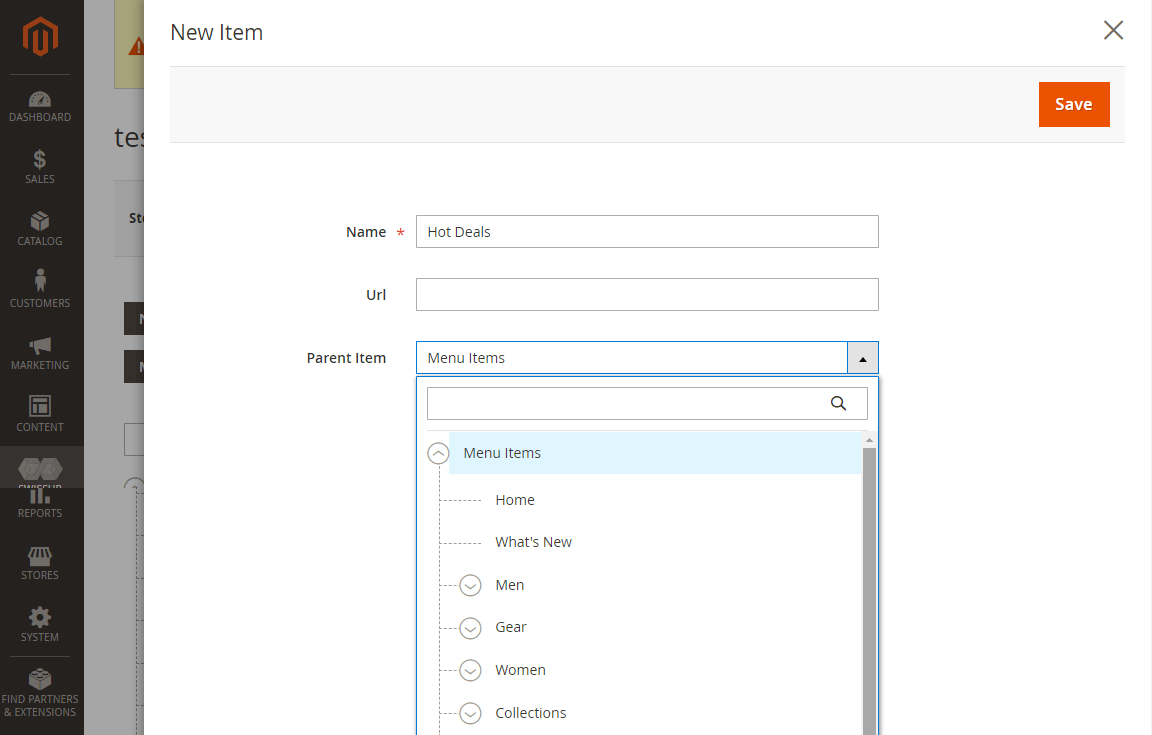
- Specify the name of the new menu item.
- You may optionally set the URL.
- Choose the parent item where the new item will be put in. In our case we select “Menu Items” as a parent item.
Now we have added Hot Deals item in category tree. After setting Use Menu settings to No, you can see Dropdown Settings fieldset.
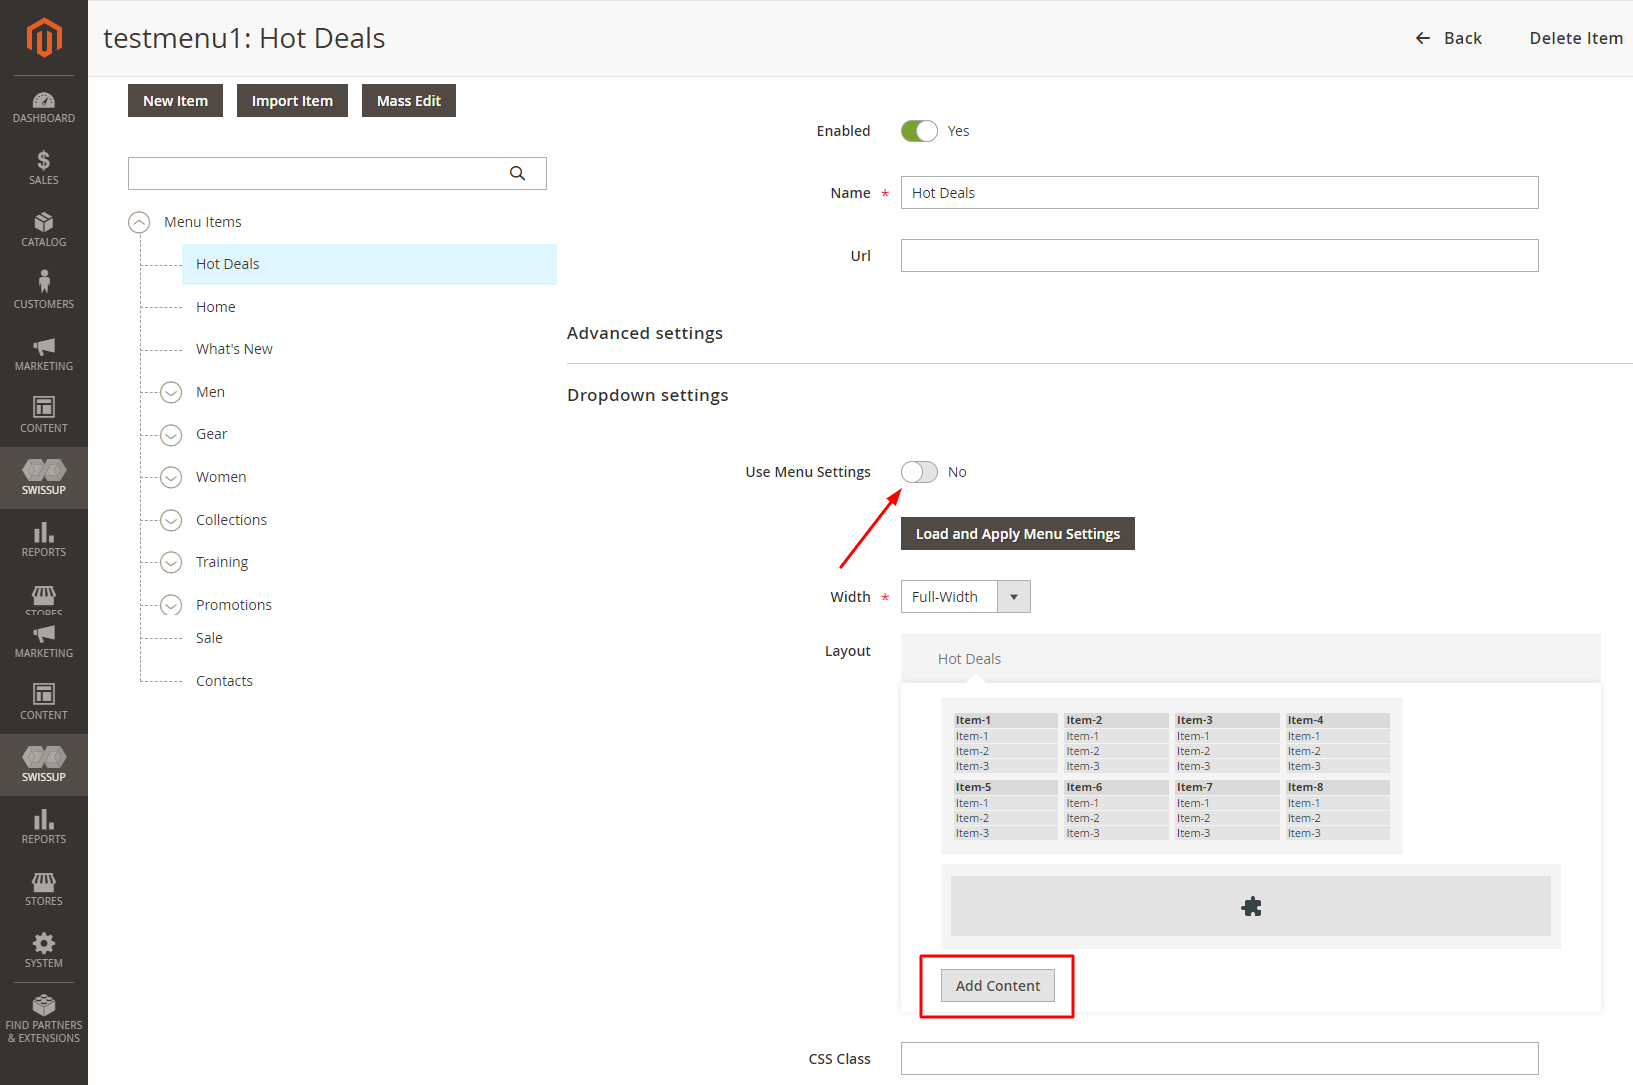
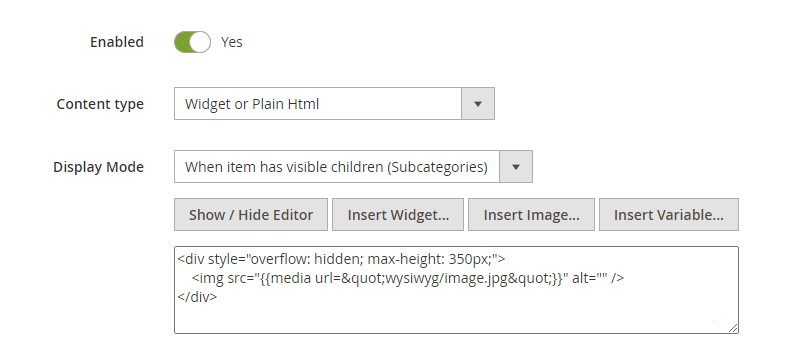
Here we can easily add the widget. You have to follow the next steps:
- Press the Add Content button.
- Fill the fields. In Content type dropdown choose Widget or Plain HTML.
- Click on Insert widget and adjust Widget Options according to your requirements. Save.
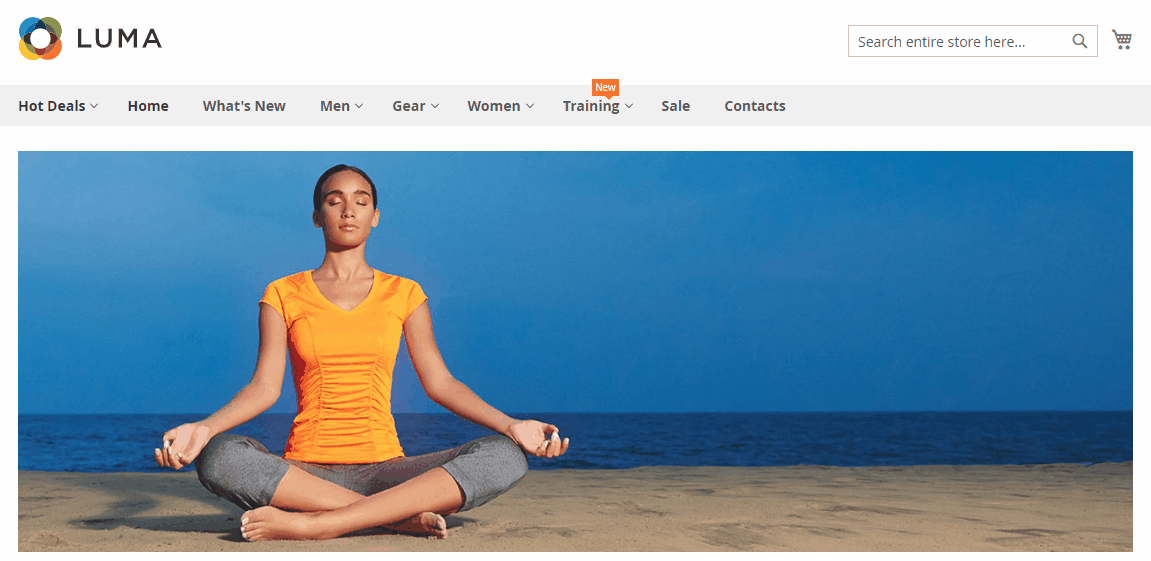
This is how it looks.
Adding image to Mega menu
With the Navigation Pro module you can easily add images to a dropdown.
- Go SwissUp - Navigation Pro and select your Megamenu. Click Menu settings button in the right top corner.
- Press Open Dropdown Settings and select First level drop-down settings.
- Click the Edit.

Insert the image. See the code we pasted.
After saving you can see that the same image was applied for all items in the first level dropdown.
What if u want to have different images in different dropdowns. We offer 2 possible ways:
- Integration with Free Easy Catalog Images. You have to install it first. Thus you receive a super fast way to apply images, descriptions, etc.
Please follow the next steps:
- Admin - Catalog - Category. Here you can see the additional field Category Thumbnail provided by EasyCatalogImages extension.
- Upload a new image for each menu category available in your store.
- Then you go to SwissUp - Navigation Pro - Your mega menu - Menu settings.
- Press the Open Dropdown Settings. In the First level, drop-down settings click the Edit the same way we've done when adding images.
- Insert the following code:
<div style="overflow: hidden; max-height: 350px;">
    {{depend remote_entity.thumbnail}}
        <img class="xs-hide sm-hide" src="{{media url=''}}/catalog/category/{{var remote_entity.thumbnail}}" />
    {{/depend}}
</div>
- If you don’t want to use Easy Catalog Images module, you can manually assign custom image in every single menu item. In this case you will work with every category from Menu items tree.
Once you select a required item, you can see the field Use Menu Settings set to Yes by default. In order to add an image to this category dropdowns, in particular, you have to follow the next steps:
- Set Use Menu Settings to No
- Now you can see custom menu settings for category.
- Click the Edit the same way we've done when adding images above. Insert your brand new image.
- Press Done. Save the changes.
To add images to every next drop down, repeat the steps as mentioned above for each top-level menu item.
See the result.

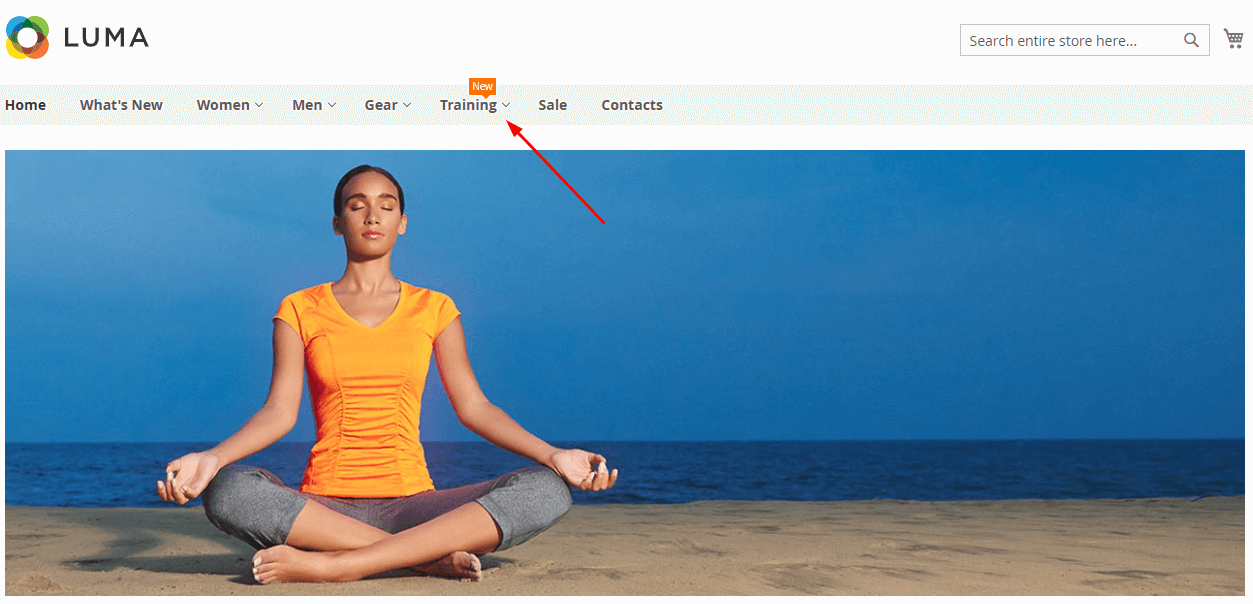
Adding label to menu item
Just a little code and you will add menu label in Magento 2. Let’s show a catchy label alongside the Training menu item.
Please go SwissUp - Navigation Pro - Your megamenu - Training category - Advanced settings. In the “Name HTML” field you have to paste the following code:
<!-- Accent Tip, placed on the top -->
><a href="{{navpro data='url'}}" class="{{navpro data='class'}}">
    <span>{{navpro data='name'}}</span>
    <span class="tip top accent">New</span>
</a>
Press Save.
Here it is.
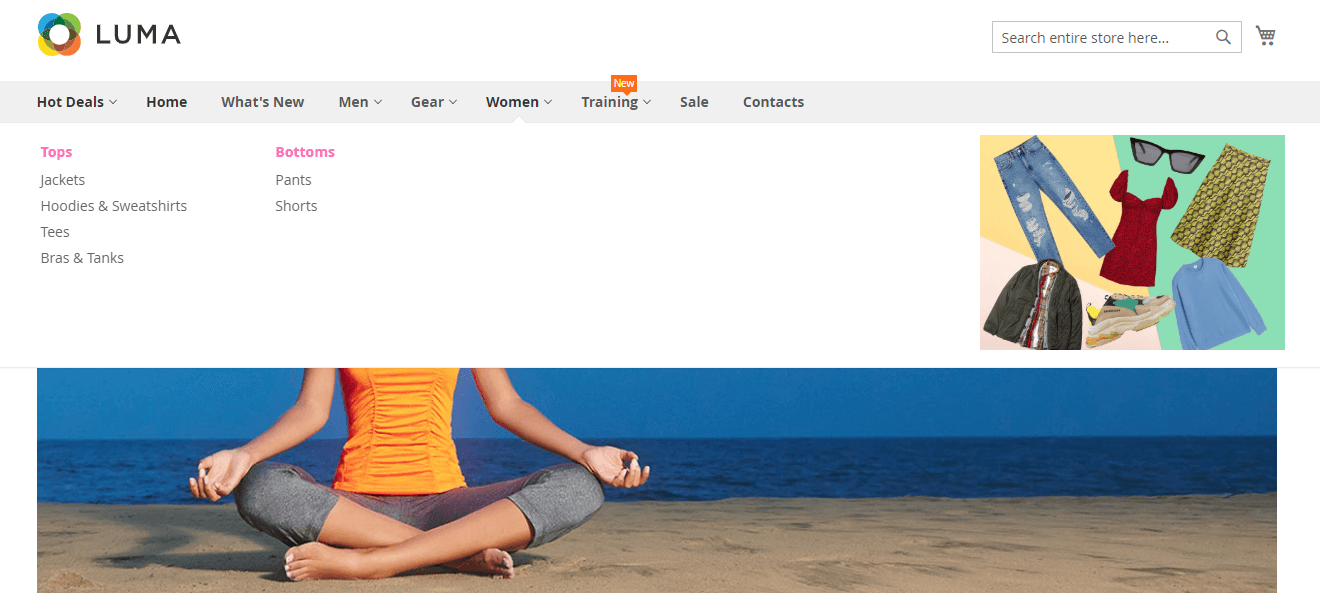
Styling Magento 2 Mega Menu
Let’s add some colors to our menu. Go SwissUp - Navigation Pro and select your Megamenu. Click Menu settings button in the right top corner. Add the following code to the CSS styles field:
And here's the result.
Summary
All right. Today you saw how to build the Magento 2 Mega menu with dropdowns, images, labels. You could see that the Navigation Pro module provides you with a fast and simplified menu adding.
By the way, with our extension, you can easily create many menu types with a few clicks. We guarantee that all of them run smoothly. We know how to solve possible UX issues when designing the Magento 2 navigation menu.
In the next post, we are gonna guide you through the process of adding the Magento 2 Iconic menu. In case you want to override the default Magento menu with other types, please let us know in the comments. We are ready to help.
Stay tuned.